
Hi and welcome to our new challenge and blog hop which is open to Australian and New Zealand Residents.
Here is the mood board for the month of April

Isnt it just devine !!!!!!!
Challenge : Create a project using the mood board as your inspiration.
The project can be a card, a scrapbook layout, art journal layout or off the page project......it's totally up to you!
Stamps :
NO Digital stamps please
The Prize :
One randomly chosen winner will win a $30 Scrapbook Boutique Store Credit.
Challenge Rules: Your entry MUST
*be newly created following the current challenge guidelines
*link back to Scrapbook Boutique Blog
*not be entered in to more than three challenge sites
*you must be an Australian or NZ resident
We look forward to seeing your creations.
Challenge Closes : Midnight, Saturday 30th April 2016.
How to Enter : Upload your entry to your blog, click on your Blog's title, copy the URL, and add it to by clicking on the InLinkz button below
OR
- If you don't have a blog you can still enter our challenge & play along by uploading your entry photo to a photo hosting site like Flickr & linking the URL of that hosted photo into InLinkz below.
- Tell your readers that you've created your project for the Scrapbook Boutique Challenge and link it back to this post
- Leave us a comment
Here is my take on the challenge. I will put more close ups and photo tutorial further down the post:


The Blog Hop:
We also have a Blog Hop happening so be sure to visit all of our talented design Gals' blogs to see their wonderful creations & leave them a comment.
Comment Prize:
Play along, you could win a Scrapbook Boutique $10 Store Credit.
(Hop closes Sunday 17th April 2016)
To be eligible to enter the Blog Hop Prize Draw you must leave a comment on all six of the Designer Gal's Blogs & then come back & leave a comment on this post where we will choose a randomly drawn winner.
Blog Hop starts HERE:
LYNN - (you are here)
And here is the process of making this layout and some close ups (sorry for the lengthy post but I hope you enjoy it)

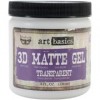
For the base I have used the cardboard backing of a 12x12 hearthfelt creations paper back as the layout is going to be wet and heavy. I started by using Tim Holtz Ideology Tissue Wrap and 3D Matte Gel - I didnt bother putting any product where my photo was going to be. I have used a brick stencil and White crackle texture paste on top of the tissue paper.

I then sprayed the entire layout with gesso spray - but you can always use watered down gesso and a brush.

While the layout was drying, I prepared the chipboard frame with Stampendous Shabby Pink Embossing Enamel and Zing Pink Embossing Powder.

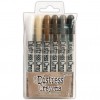
I have used the new Tim Holtz Distress Crayons around the brickwork, smuding as I went. They are black soot, walnut stain, vintage photo and peeled paint.

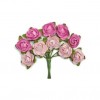
Once I laid down the photo and frame, placed the assortment of flowers around, I added a few sayings from Tim Holtz Idea-ology small talk.

Some additions of glass beads, clear micro beads and glitter and the layout is complete.
Some close ups:


Well if you have made it this far I am pleased that you took the time to view the process and maybe learnt something.
If you are playing along with the blog hop - it is Therese that is up next - and the last one -
click here to go to her page

Beautiful. love everything about this.
ReplyDeleteWow! Lynn this is really something - so much to take in and so I appreciated your step by step tutorial! I'm interested in the TH crayons - the effect you created on the bricks is great! Beautiful layout!
ReplyDeleteLove the frame and all the amazing flowers..well done.
ReplyDeleteStunning page, so beautifully put together with a beautiful young lady at the centre of it.
ReplyDeleteThis is so amazing, I just adore all those wonderful layers!
ReplyDeleteLove the effect you've achieved with the tissue wrap Lynne. Gorgeous work.
ReplyDeleteThanks for the photo tutorial. Great effect.
ReplyDeleteLovely LO
ReplyDeleteJust gorgeous!
ReplyDeleteFabulous to see your process Lynn. Love the sparkle additions and the flowers on this layout.
ReplyDeleteLouise xo
Lynn this is absolutely beautiful! Thank you for the close ups so I can see all the beautiful details. WOW WOW WOW!!! Welcome to the team xx
ReplyDeleteFabulous flowers and a fantastic use of the frame. Really gorgeous. :)
ReplyDeleteLynn, thank you so much for the effort of putting together your photo tutorial! It shows off your delicious layers to perfection (so many flowers - I'm a bit overwhelmed!!). I love the texture work you've put into the background, with the tissue and stencilling with crackle - amazing!
ReplyDeleteDeb.xx
Gesso one of my favourite mediums to use ... haven't quite mastered the micro beads yet I'll get there tho ... Your layout is just lovely love all the flowers ... tissue paper gives a lovely effect on the background x
ReplyDeleteBeautiful page, love everything, the crackle paint, the sparkle and the flowers, the enamel on the frame, amazing, Cathy x
ReplyDelete