Thursday, 7 December 2017

Steampunk Canvas for Scrap FX DT

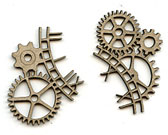
Hi there, today I am up on the Scrap FX blog to share a canvas I created using the awesome steampunk chipboard that is available at Scrap FX.


I began by using modelling paste and a couple of stencils randomly around the canvas in the areas I knew I wouldnt be placing the chipboard.  I also glued down some lace and some hearts that I had made out of silicone molds and chaulking paste.
I then placed the chipboard and embellishments around until I was satisfied and then adhered them with gel medium.

Once all adhered and dried, I sprayed with White Gesso Spray.

At this point it was time to add the colours, building up the layers and removing them from areas as I went.  I started with the blue/greens - I have used Shimmerz Inklings - Me & Blue and Blue my mind.


I then went on and applied the darker colours - again I have used the Shiummerz Inklings - Burnished Buckle, Tarnished Treasure and Penny for your Thoughts as well as the Finn Art Alchemy paints - Metallique Steampump Copper and Ancient Coin Gold.
I have coloured the edges with Distress Ink - Ground Expresso as well as the two Art Alchemy paints.

Final touches include Glass Beads, Micro Beads and Glitter,
I have linked the chipboard used to the Scrap FX store at the bottom of the blog
Here are some close up:


List of Chipboard used:

Thanks for stopping by and until next time - Happy Crafting :)

Wednesday, 6 December 2017

Technique post - Art and Soul DT

Today I would like to share with you the technique of creating a steampunk style cover for your album, art journal, diary or the such like.


I began my using a Scrapmatts stencil and Finnabair 3D Gloss Gel 


Once dried I covered the entire cover with black gesso and then began apply colours.  I have used Finnabair Art Alchemy Metallic paints - I will list the colours below


Once dried I have covered the entire cover with dimensional magic for the glossier look.


I have cut some cardboard using the Tim holtz Gadget gears and coloured them with the same Art Alchemy metallic colours as the cover and applied dimensional magic to them (a little bit of a fan of the end result of dimensional magic!!!!)


I have then adhered then to the cover - here are some close ups:


Thanks for stopping by and I hope the you have been inspired by this mixed media piece.

Product used:


Til next time  - Happy Crafting


Monday, 4 December 2017

Design Team Layout for Scrap Matrix

Hi everyone, today I would like to share another layout that I have created using the 7 Dots Dreamscapes Collection for Scrap Matrix.


For the background I have used the 7 Dots triangle stencil and Distress Oxide - Frayed Burlap.  I have then wound the paper with cotton string. 
For the photo matting, I have used tags from the Dreamscapes collection - edging with Distress Oxide - Frayed Burlap.   I have created depth by placing cardboard between the layers of tags.
The Scrap FX chipboard title has been embossed with Ranger Black Embossing Powder.

I have linked the products used below

Here are some close ups:


Products used:


Thanks for stopping by - until next time - Happy Crafting


Saturday, 25 November 2017

Art Journal Page for Visible Image Design Team

Hi everybody, today I have an art journal page to share with you that I have created for Visible Image.


I began by putting down some bold colours - I find this often gives me clarity about what I want to do


I have used Dylusion paints - Lemon Zest, Postbox Red, and Tangerine Dream.

I have used the Time Tunnel stencil and Distress Ink Chipped Sapphire to create the focal points


I used Dina Wakeley Heavy Body White paint and a brayer randomly around the pages.  With the left over white paint I applied this to the Strobes Stencil and using a roll of paper towel, pressed it onto the page.


On a seperate piece of paper I have stamped the eye from the Where Dreams Take you stamp set and cut it out, adhering it to the art journal page using matte gel medium.  I have coloured the eye with a watercolour blue.

I have then randomly stamped around the layout using stamps that I have listed below in the products list.    I have used a white paint pen and the Dylusions paints to highlight areas.  For the final touch I have applied Whipped Spackle paste through a stencil randomly on the layout to bring it all together.

Here are some close ups:


Products Used:


Thanks for stopping by and I hope that I have given you some inspiration to get out the bold colours are create. 
Til next time - Happy Crafting!


Hi everyone, today I am up on the Art and Soul blog  sharing how I created the background page on two art journal spreads using Finnabair Mica Powders and Finnabair Art Alchemy paints and waxes. (I have put links at the end of the blog for the products used).

I began by using Finnabair 3D Gloss Gel through a stencil on black art journal book


Once dry I have applied some Mica Powders.  The first coat comes up a bit like a white wash


Once dried I applied a second coat.  I have applied the powders direct to the paper and spritzed with water and then used a large brush to encourage the paints where I wanted them.


Once the second coat was dry I have applied some of the Art Alchemy waxes randomly on the stencilled areas.  I have used my fingers to apply as I find I have more control this way.
I have then applied a top coat of satin varnish. This will seal the colours in a gives it a nice shine.


I have added a couple of images, quotes and rub-ons and splatters of gesso to complete the page


For the second page, I have done the same technique with the stencil and gloss gel.  I have then done a light covering with the Mica Powders


I have them come in with the Art Sparks paints and Alchemy waxes and highlighted the flowers.  Again I have done this with my fingers.  The colours are fantastic and change depending on the angle you hold the paper


I have again sealed this with satin varnish.

My background is now complete and ready for some word stickers or maybe a quote.

here is a list of the products used with a link to the shop.


Thanks for stopping by and I hope that you have enjoyed my blogpost.  
Til next time - Happy Crafting.